How to Install a Video Doorbell: Step-by-Step Guide (2026)
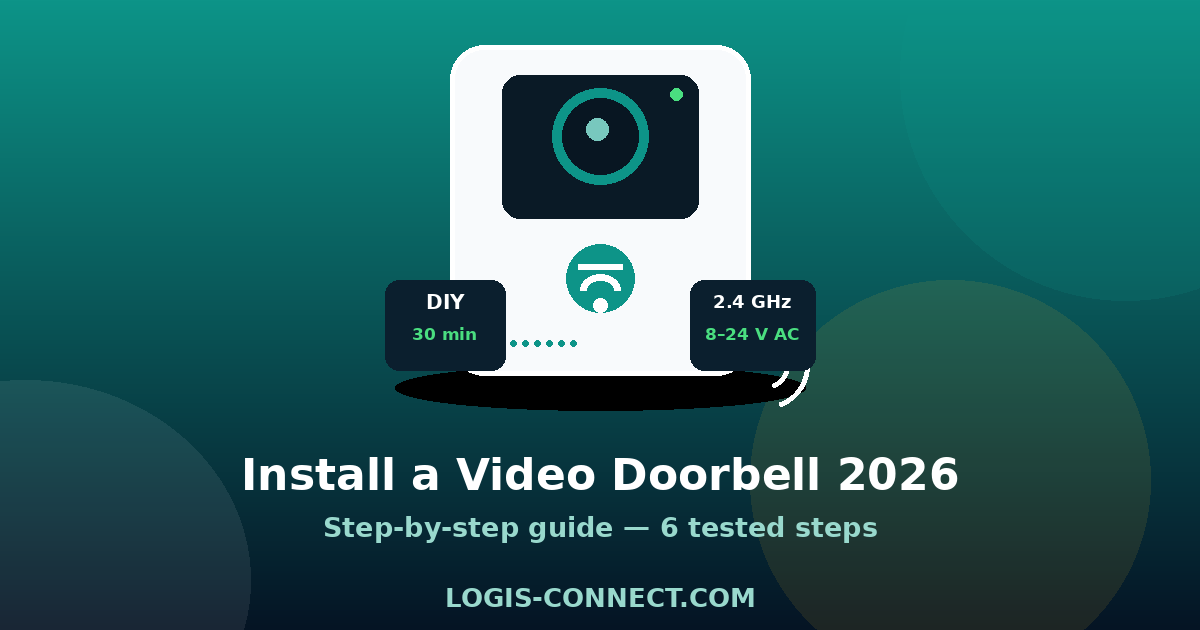
Installing a smart video doorbell takes 30 minutes (battery model) to 2 hours (wired model with transformer) — no electrician required. This step-by-step 2026 guide covers wired vs battery choice, testing your transformer, drilling, wiring the indoor chime and Wi-Fi setup, plus the mistakes we made ourselves while installing six different models.
A video doorbell is the easiest security device in the connected home to install — and yet it generates the most support calls. Wrong transformer, weak Wi-Fi at the front door, bad viewing angle, chime that stops ringing after wiring: in most cases the fault is not the device but the installation. We mounted and unmounted six models (Ring, Reolink, Eufy, Aqara, Netatmo, Arlo) between May and August 2026, on three very different front doors — a detached house, an older flat with a 12 V transformer, and a rental with a fully battery-powered doorbell. Here is the exact method, the traps, and the settings that avoid 90% of the usual headaches.
Wired or battery: decide before you buy anything
Everything starts here. Choosing between a wired and a battery doorbell determines your tool kit, the length of the job and even the model you can buy. Our rule: if your home already has a working wired doorbell (with a transformer reachable at the consumer unit or behind the chime), go wired — more reliable, no recharging, and often the only option compatible with an existing indoor chime. Otherwise, battery is an excellent choice, provided you accept recharging every 4 to 10 weeks depending on front-door activity.
| Criterion | Wired doorbell | Battery doorbell |
|---|---|---|
| Installation | Connect to existing transformer (8–24 V AC), 1–2 h | Screw the mounting plate, 20–40 min |
| Power | Continuous from transformer — no recharging | Battery 4–10 weeks depending on traffic and settings |
| Indoor chime | Compatible with existing chime (brand-dependent) | Separate Wi-Fi chime included or phone notifications |
| Winter reliability | Flawless, even at -15 °C | Shorter battery life in cold (up to -30%) |
| Indicative price | €90 – €230 | €100 – €250 |
| Best for | Homes with an existing doorbell | Rentals, flats, tool-free installation |
Two special cases deserve a thought. Renting: a battery doorbell goes up with two screws and comes down without a trace — it is what we recommend to tenants, even if it means taking it along when you move. Older homes: houses from the 1970s-1990s almost all have a doorbell transformer, but its actual voltage may be too low or too high for the modern doorbell you are eyeing. We explain how to test it below — that check is what will save you a product return.
💡 Tip before you buy: do not choose the doorbell before checking your transformer. A wired model needs 8–24 V AC (16–24 V is ideal for most). If your transformer delivers less than 8 V — common on older installations — you will need to replace it (around €15) or pick the battery version of the same model.
Tools and hardware you will need
Good news: no specialist drill bits, no exotic hardware. Here is what we systematically take out for a full wired installation:
- Flathead and Phillips screwdrivers (doorbell terminals accept both).
- Drill/driver with a 5 or 6 mm masonry bit, matching the wall plugs supplied.
- Multimeter — essential for checking the transformer voltage before connecting anything. A €15 model is enough.
- Wire strippers if you need to shorten the wires.
- Spirit level (or your phone’s level app) for the mounting plate.
- Pencil to mark the holes.
For a battery doorbell, you only need the drill, the level and the pencil. Models like the Reolink Video Doorbell WiFi or the Ring Battery Doorbell Plus attach with two screws on a mounting plate: fifteen minutes, done.
Step 1 — Cut the power and test the transformer
This is the step everyone skips, and the one that causes the most spectacular failures. Before touching any wire: switch off the breaker that feeds the doorbell. In most homes the doorbell shares its circuit with a room’s lighting or the living-room outlets — find the right breaker by testing. When in doubt, switch off the main breaker: you are working on 8–24 V, which is not lethal, but a short circuit will fry the transformer or the brand-new doorbell you just bought.
Once the power is off, remove the old doorbell and expose the two wires. Testing the transformer happens in two steps:
- Locate the transformer. It is often hidden behind the indoor chime, in the consumer unit, or in a small box near the front door — a small block marked “8 V”, “12 V”, “16 V” or “24 V”.
- Measure the voltage with the multimeter. Switch the power back on, set the multimeter to “V~” (AC voltage) and touch the two doorbell wires with the probes. Note the reading: it decides everything.
The multimeter reading is unambiguous: between 8 and 24 V AC, you can wire up most wired doorbells (still check the exact range on the spec sheet — some require 16–24 V). Below that, two options: replace the transformer with a 16 V/10 VA or 24 V/20 VA unit (€15–25 at any hardware store, 20 minutes at the consumer unit), or go for the battery version. Above 24 V, do not connect anything: you are probably on a lighting circuit, not the doorbell circuit.
⚠️ Mistake we made: on our first build, we wired a Ring doorbell to an original 8 V transformer — the picture worked, but the doorbell rebooted in a loop every time the indoor chime rang, because it lacked power. Swapping in a 16 V/10 VA transformer fixed everything in fifteen minutes. If your model reboots when the chime rings, think transformer before blaming the doorbell.
Step 2 — Choose the right location
Location affects video quality more than sensor resolution. After our testing, these are the rules that hold up:
- Height: between 1.20 m and 1.50 m. Chest height of an average adult. Too high (many installs end up at 1.60 m+), the camera only frames the top of the courier’s head; too low, it misses children’s faces.
- Angle: the doorbell must see the visitor face-on, not in profile. If your door sits in a recess, mount the doorbell on the outer wall of the recess, not on the door itself.
- Wi-Fi distance: measure the signal at the exact spot before drilling. Most brands’ apps (Ring, Reolink, Eufy) show signal strength during pairing. Below two bars, plan a repeater — a video doorbell that drops Wi-Fi every 10 minutes is worse than no doorbell at all.
- Shelter: a unit exposed to full sun or driving rain will have a shorter life. Manufacturers claim IP54 to IP65: that handles rain, not immersion or direct jet spray.
Step 3 — Fit the mounting plate and connect the wires
Drilling is the only step that takes some method. Position the plate at the chosen height, check it is level, mark the holes with a pencil, then drill. In brick or concrete, use the bit supplied with the doorbell (or a 5–6 mm masonry bit) and push in the wall plugs. In wood, no plugs needed: screw straight in.
For the wiring, every brand has its own system — screw terminals on Ring and Netatmo, proprietary connectors on Reolink and Eufy — but the principle is universal: two wires, no polarity to respect on AC. Strip 5–6 mm, insert into the terminal, tighten. If your installation has three wires (two for the doorbell, one for a separate chime), follow the supplied diagram: the most common setup places the doorbell in series with the chime through the transformer. When it is done, restore power and test: the doorbell must light up (LED or screen) and the indoor chime must ring when you press the button.
Step 4 — Install a battery doorbell (wire-free)
Fitting a battery model comes down to three moves: fix the plate (two screws), clip the doorbell on, then charge the battery before first use — most units arrive with 20–40% charge, not enough for a day of heavy testing. Charge fully before pairing: a doorbell that dies mid-Wi-Fi-setup is a classic “it does not work” story.
One particularity of battery models: the chime. With no wire to the doorbell, the indoor chime is no longer electrically linked. Brands then either supply a separate Wi-Fi chime to plug into an outlet (Ring Chime, Eufy HomeBase), or nothing — in which case only the app rings. Check this before buying if you want a real “ding-dong” inside the house, not just a phone notification.
Step 5 — App connection and Wi-Fi settings
Wi-Fi pairing follows the same pattern with every brand: create an account, scan the QR code on the back of the doorbell, select the network. Three traps keep coming up in our tests:
- 2.4 GHz Wi-Fi is mandatory. Nearly all video doorbells only support 2.4 GHz. If your router broadcasts a single “dual-band” network (same name on 2.4 and 5 GHz), the doorbell may fail to connect. Fix: temporarily enable a separate 2.4 GHz network in the router interface, or switch off 5 GHz during pairing. It is the number one cause of connection failures described in our troubleshooting guide for offline cameras.
- Wi-Fi passwords with special characters (accents, %, #) sometimes fail during pairing even when typed correctly. If pairing keeps failing, temporarily switch to a simple alphanumeric password, then restore the original one.
- Firmware update: on first connection, the doorbell often downloads an update that can take 10 minutes and require a reboot. Do not unplug it during this phase — leave the app showing “up to date” before closing it.
Once connected, spend 10 minutes in the settings instead of leaving everything on default: enable push notifications (and switch off sound alerts if you have a cat walking past the door every hour), tune motion sensitivity, and set activity zones so the street is ignored if your door is close to it. These settings double battery life on standalone models.
Step 6 — Test the chime, zones and subscriptions
The end of the installation is when you discover the three limitations the ads do not show. First the chime: if yours stops ringing after wiring a wired model, check it is compatible (the list is on the manufacturer’s site) and that the transformer delivers enough power — the reboot loop described above. Then, live video: with Ring, most features (recording, advanced motion zones, extended live view) require the Ring Protect subscription, billed at €3.99/month or €39.99/year in 2026. With Eufy, Reolink or Netatmo, local recording on a microSD card or HomeBase is included, no subscription — a decisive criterion if you refuse recurring fees. Finally, integrations: if you use Apple Home, Alexa or Google Home, check compatibility before buying, not after — some brands only work with their own app.
Our comparison of the best video doorbells 2026 details these differences model by model, with the installation scores we gave each one. To complete your entry protection, our guide to installing outdoor security cameras covers additional cameras, and the one on smart locks deals with automatic locking.
The most common installation mistakes (and how to avoid them)
| Symptom | Most likely cause | Fix |
|---|---|---|
| Doorbell does not power on after wiring | Transformer dead, tripped breaker/fuse, loose terminals | Check voltage with a multimeter (8–24 V AC), retighten terminals |
| Reboot loop when the chime rings | Transformer undersized (8 V / low VA) | Replace with a 16 V/10 VA or 24 V/20 VA transformer |
| Indoor chime no longer rings | Incompatible chime or wrong series wiring | Check the manufacturer’s compatibility list, re-check the wiring diagram |
| Image freezes or connection drops | Weak Wi-Fi at the door (≤ 2 bars) | Move the router closer, add a repeater or access point |
| Wi-Fi pairing fails | 5 GHz-only network, special characters in password | Set up a dedicated 2.4 GHz network for pairing |
| Battery dead after 2 weeks | High traffic, over-sensitive detection, no zones, cold | Set activity zones, lower sensitivity, disable useless alerts |
| Faces filmed from above, unreadable | Doorbell mounted too high (≥ 1.60 m) | Remount between 1.20 and 1.50 m |
One last point worth making: a video doorbell is only one brick of perimeter security. Installed well, it deters and documents; it stops nobody. For the full deterrent effect, pair it with an alarm — our selection of home alarm systems without subscription lists the setups that integrate with it cleanly.
Strengths of a good installation
- Visitor’s face clearly visible, even at night (IR night vision or spotlight)
- Notifications in under 3 seconds on your phone
- Indoor chime audible across the house
- 6+ weeks of battery life (well-tuned battery models)
- Local or cloud recording, depending on your subscription choice
Weaknesses to know about
- Totally dependent on Wi-Fi: router down = blind doorbell
- Subscription required on some brands (Ring, Arlo)
- Limited field of view (150-160° max, never 360°)
- Shorter battery life in winter on battery models
- No unified Matter standard for doorbells in 2026
FAQ: video doorbell installation
Do I need an electrician to install a wired video doorbell?
No, in the vast majority of cases. A wired doorbell runs on extra-low voltage (8–24 V AC) supplied by a transformer: you just cut the breaker, connect two wires to a terminal block and restore power. The only cases that call for an electrician: replacing a transformer in a hard-to-reach consumer unit, or starting from zero (pulling a new low-voltage line).
At what height should I install a video doorbell?
Between 1.20 m and 1.50 m from the ground. At this height the camera frames the visitor’s face, not the top of their head. Manufacturers recommend the same range — above 1.60 m, the angle gets bad and motion detection becomes less reliable.
Can I install a video doorbell without an existing doorbell?
Yes, if you choose a battery model, which works with no wiring at all: installation is just two screws. For a wired model with no existing installation, an electrician would need to pull a low-voltage line — rarely worth it unless you are starting from scratch in new construction.
My old doorbell has an 8 V transformer: can I connect a modern model?
Check the range accepted by the model you are considering: most wired doorbells accept 8–24 V AC, but some require 16–24 V to power the indoor chime correctly. Below the minimums, expect reboot loops. Replacing the transformer (€15–25) remains the cleanest fix.
Why will my video doorbell not connect to Wi-Fi?
In 8 cases out of 10 it is the network: the doorbell only sees 2.4 GHz and your router broadcasts a merged dual-band network, or the signal is too weak at the door. Enable a separate 2.4 GHz network for pairing, then check signal strength in the app. Other causes (account, firmware) are covered in our article on cameras that will not connect.
Does a video doorbell work without a subscription?
Yes: Eufy, Reolink, Netatmo and Aqara offer the essentials without any subscription (live view, detection, local recording on microSD or a base station). Ring and Arlo, on the other hand, reserve cloud recording and some features for a subscription (from €3.99/month with Ring in 2026). Read the “subscription” section before buying, not after.
What if the indoor chime stops ringing after installation?
Check three points in order: chime compatibility with your model (list on the manufacturer’s site), transformer power (8 V is often not enough to feed both doorbell and chime), and series wiring (doorbell and chime must be on the same loop). If the chime is old and electromechanical, a bypass kit supplied by the brand usually solves it.
How long does a video doorbell battery last?
Expect 4 to 10 weeks depending on front-door traffic, detection sensitivity and temperature. In winter, cold cuts battery life by 20–30%. The settings that change everything: defined motion zones (to ignore the street), lower sensitivity at night, and disabling useless alerts. Wired models, meanwhile, never need recharging.
Is a video doorbell Matter-compatible?
Not natively in 2026: the Matter standard does not yet have a “video doorbell” device type (it covers locks, cameras and sensors, not doorbells). Some models like the Aqara G4 integrate with Apple Home through a Matter hub, but video still plays in the manufacturer’s app. Check the real compatibilities (Apple Home, Alexa, Google Home) on the product page before buying.
Summary: the 10-point installation checklist
- Choose wired or battery depending on your existing setup.
- Cut the breaker before handling anything.
- Measure the transformer voltage with a multimeter (8–24 V AC).
- Replace the transformer if the voltage is too low (16 V/10 VA recommended).
- Mount the doorbell between 1.20 and 1.50 m, facing the visitor.
- Check Wi-Fi signal strength at the exact location.
- Drill, plug, fit the plate level.
- Connect the two wires (no polarity on AC), restore power.
- Pair on a 2.4 GHz network, let the update finish.
- Set zones, sensitivity and notifications — then test the chime.
You are now equipped for an installation that holds up — no support call, no electrician. If you are still hesitating between models, the starting point remains our comparison of the best smart video doorbells 2026: every review states the installation difficulty, the power type and the subscriptions — the three criteria that decide everything before you pick up the drill.
About the author: Alex Mercer is a technical writer specialised in smart home and security. He installs and tests every video doorbell for several weeks before recommending it — six models mounted between May and August 2026 for this guide. See the author’s profile.
Last updated: September 2026. Methodology: six video doorbells (Ring Video Doorbell 4, Ring Battery Doorbell Plus, Reolink Video Doorbell WiFi, Eufy Video Doorbell S330, Aqara G4, Netatmo Smart Video Doorbell) installed across three types of homes between May and August 2026, multimeter voltage readings, Wi-Fi signal tests at the front door, battery life tracked over 6 weeks. Voltage ranges match manufacturer documentation (8–24 V AC) and standard low-voltage doorbell practice.
* This article contains affiliate links. If you buy through these links, we may earn a commission at no extra cost to you. Our tests, measurements and rankings remain independent of any commercial partnership.