How to Install an Outdoor Security Camera: Step-by-Step Guide 2026
Installing a wireless outdoor security camera takes 45 minutes to 2 hours — no big drilling, no cable runs. In this step-by-step 2026 guide, we show you how to pick the right spot, mount the camera, connect it over Wi-Fi (or Matter/Thread), set up motion detection and fix the most common issues — all without hiring an installer.
TL;DR: (1) Pick a spot 2.5–3 m high, out of arm’s reach, angled to cover the entrance without filming the street or the neighbour’s property. (2) Mount the camera on a wall or gutter (supplied bracket, screws or reinforced adhesive depending on the model). (3) Power it up (battery, solar or mains) and insert the microSD card if supported. (4) Install the app, create the account and scan the QR code. (5) Connect the camera to 2.4 GHz Wi-Fi, ideally within 15 m of the router or an access point. (6) Set activity zones, sensitivity and notifications. (7) Test night vision and storage. Budget: expect £50–£220 (€60–€250) for a decent wireless outdoor camera, zero installation fees.
Disclosure: this article contains affiliate links. If you buy through our links, we may earn a commission at no extra cost to you. Our recommendations are based on identical criteria for every brand.
Why install an outdoor security camera yourself in 2026?
Mounting a wireless outdoor camera yourself is well within reach of beginner DIYers, and the approach brings three concrete benefits in 2026.
1. Save $90–$220 in labour costs
Professional installation of an outdoor camera typically costs $90–$220 in 2026, depending on height and cabling complexity. With a battery- or solar-powered wireless model, you only pay for the device (€60–€250): the total saving often reaches 40–50% compared with a fully wired installation by an electrician.
2. Deterrence remains the most effective effect
Official statistics show that a visible camera at the entrance is a documented deterrent: burglars spot and avoid homes with an obvious video-surveillance system. In France alone, around 211,000 home burglaries were recorded in 2024 (Ministry of the Interior, 2025 report) — nearly 580 a day. The effect is even stronger when the camera is combined with an alarm and motion-triggered lighting.
3. Coverage, real-time alerts and evidence
Beyond deterrence, an outdoor camera alerts you in real time (push notification, built-in siren on some models) and records usable video evidence in case of an incident. 2026 models offer colour night vision, person detection (not just generic motion), zoom, and — on the latest units — Matter 1.4 support, so you can control the camera from Apple HomeKit, Google Home or Alexa without a mandatory cloud account.
Before you start: location, tools and model choice
Where should you place the camera? The 4 golden rules
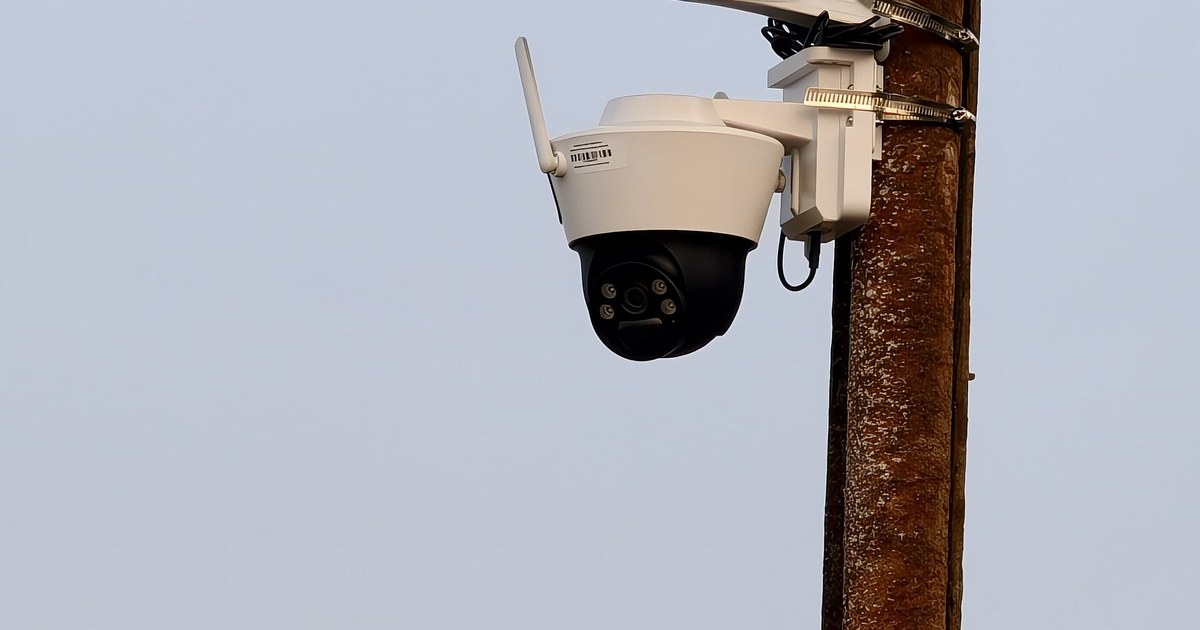
- Height: between 2.5 and 3 m — high enough to be out of arm’s reach, low enough to identify a face.
- Angle: cover the entrance, driveway or gate at an angle (not head-on) to maximise the filmed area and avoid backlight.
- Don’t film the street or the neighbour: private video surveillance must stay within the boundaries of your property (see the privacy section below).
- Wi-Fi range: place the camera within 15 m of the router or an access point, ideally with a stable 2.4 GHz connection (cameras often don’t support 5 GHz).
Tools you’ll need
- A drill/driver with a masonry bit (usually 6 mm) — or a screwdriver if the bracket is hand-tightened
- A spirit level (or the in-app level)
- A tape measure to mark the holes
- A pencil to mark the drilling points
- A smartphone with the manufacturer’s app, 2.4 GHz Wi-Fi and optionally a microSD card (32–256 GB depending on the model) for local storage
- A stable ladder for high placements
Wired, battery or solar: which type to install?
| Type | Installation | Power | Best for | Examples |
|---|---|---|---|---|
| Battery (wireless) | Screwed or adhesive bracket, no cables | 3–6 months depending on activity | Renting, quick install, gutters and tricky façades | Arlo, Ring, Tapo, Reolink |
| Solar | Panel mounted separately, wireless camera | Unlimited in sunlight, backup battery | Sunny areas with no outlet | Reolink, Eufy, Ring Solar |
| Wired (mains) | Power cable to hide or run in conduit | Permanent | Homes with a nearby outlet, continuous recording | TP-Link Tapo, Dahua, Hikvision |
For a first install, a battery model with an adhesive or screw bracket is the best compromise: under an hour to mount, reversible without marks, and you can move the camera if the angle isn’t right. Our guide to the best wireless outdoor security cameras 2026 compares models to help you choose before you install.
Step-by-step wireless outdoor camera installation
The procedure below applies to the vast majority of consumer wireless outdoor cameras (Arlo, Ring, Tapo, Reolink, Eufy). Always refer to your model’s manual for specific details.
Step 1 — Choose the location and check the Wi-Fi signal
Before drilling, do a “hand test”: hold the camera at the planned spot and open the live preview in the app. Check that the image is sharp, the field covers the desired area and the Wi-Fi signal shows at least 2 bars. If the signal is weak, move the camera closer to the router, add a repeater or choose a Matter/Thread-compatible model with a border router.
Step 2 — Mount the bracket
- Mark the drilling points with a pencil using the bracket as a template, level in hand.
- Drill with the bit suited to the material (concrete, brick, wood) — use the supplied wall plugs.
- Screw the bracket in place, then clip or screw the camera onto it. For adhesive brackets (smooth façades), clean the surface, degrease it and let the adhesive cure for 24 h before clipping the camera.
Step 3 — Power the camera
Battery: charge it fully before mounting (some brands require a 4–6 h initial charge). Solar: point the panel south (northern hemisphere) at a 30–45° angle, with no shading. Mains: plug the adapter into a protected outlet (ideally a surge protector) and route the cable cleanly, securing it with cable clips or in a conduit.
Step 4 — Install the app and create the account
Download the manufacturer’s app (Arlo Secure, Ring, Tapo, Reolink, Eufy Security…), create an account with a strong password and enable two-factor authentication (2FA) if offered — it’s the #1 security habit for a connected camera.
Step 5 — Connect the camera to Wi-Fi
In the app, tap “Add device”, scan the QR code on the back of the camera (or in the manual), then select your 2.4 GHz Wi-Fi network (temporarily disable 5 GHz on some routers to ease pairing). Enter the Wi-Fi password. The camera beeps or flashes when connected. For Matter models, pairing also works via the Matter QR code in Apple Home, Google Home or Alexa.
Step 6 — Adjust the angle and detection zones
In settings, define activity zones so you only monitor your property, adjust the sensitivity (high for a driveway, medium for an entrance) and enable person detection if supported — it cuts false alerts (animals, cars, branches). Turn on push notifications and, if available, the built-in siren for intrusions.
Step 7 — Set up storage
Two options: local storage (microSD card in the camera or base station, often up to 256 GB) and cloud storage (usually paid, from about $3–$11 per month depending on the brand). To avoid any subscription, pick a model with microSD or a local station, and check that continuous or event recording covers your needs. Our guide to Matter-compatible security cameras details models with no mandatory subscription.
Step 8 — Test the whole system
- Check night vision: cover the camera or wait for darkness and check image sharpness.
- Walk through the detection zone and check the notification arrives within 10 seconds.
- Verify the recording is actually written (microSD or cloud) and playable.
- Test remote access from a 4G/5G network: the live view must load.
- If the camera has a siren, trigger it once to check the volume.
Private video surveillance and privacy: what you need to know
Filming your own garden or entrance is allowed, but two rules apply: the camera must not film the public street or your neighbours’ property (adjust the angle and detection zones accordingly), and if it does capture public space, local data-protection rules (GDPR / CNIL in France, ICO in the UK) may require formalities. In practice: point the camera at your property, display a “video surveillance” pictogram if it is visible from the street, and use the footage only for home security (no public sharing). In shared buildings, installing cameras in common areas requires the owners’ agreement.
Why is my outdoor camera not working?
Here are the most common faults after an installation, and their fixes.
| Symptom | Likely cause | Fix |
|---|---|---|
| Live view keeps cutting out | Weak Wi-Fi signal or 5 GHz band | Move closer to the router, switch to 2.4 GHz, add a repeater |
| No motion notifications | Detection zones or sensitivity misconfigured | Widen the zone, raise sensitivity, check in-app notifications |
| White or blurry night vision | Reflection (rain, spider) or dirt on the sensor | Clean the lens cover, adjust the angle to avoid direct reflections |
| Battery drains in 2 weeks | Max sensitivity + continuous recording | Switch to person detection, reduce recording frequency |
| Camera won’t connect to the app | Blurry QR code, 5 GHz Wi-Fi, guest network | Retry with the QR from the manual, disable 5 GHz while pairing |
| No sound or siren | Mic disabled or volume at zero | Enable audio in settings, test the siren during the day |
FAQ — Outdoor security camera installation
Do I need an electrician to install a wireless outdoor camera?
No. A battery or solar camera is installed in 45 minutes to 2 hours with a drill, a level and the manufacturer’s app. An electrician is only useful for wired models with cables routed through walls.
At what height should I install an outdoor security camera?
Between 2.5 and 3 m: high enough to be out of arm’s reach, low enough to identify a face and change the battery without a dangerous ladder.
Can I install an outdoor camera without drilling?
Yes, some brackets are adhesive (smooth façades, windows, gutters). Clean and degrease the surface, then let the adhesive cure for 24 h before clipping the camera. For long-term outdoor durability, a screwed mount is still recommended.
Does a wireless camera work without a subscription?
Yes for local use: live view, motion detection, microSD recording and notifications. Cloud storage and some features (advanced person detection, warranty) may require a subscription depending on the brand.
Is it legal to film outside my home?
Yes, if the camera only films your property. Filming the public street or neighbours is not allowed (or subject to data-protection formalities). Adjust the angle and detection zones to stay within your property.
What Wi-Fi range does an outdoor camera need?
Expect 10–15 m indoors-to-outdoors with a wall between the camera and the router. Beyond that, add a Wi-Fi repeater, an access point, or choose a Matter/Thread model that uses a border router.
How long does an outdoor camera battery last?
3 to 6 months in normal use (person detection, a few recordings a day). Solar models recharge themselves in sunlight; in winter or under an eave, plan for manual recharging.
Can an outdoor camera withstand rain?
Choose an IP65 rating or higher (IP66/IP67) for exposed installations. Also check the stated temperature range (often -20 °C to 45 °C).
How do I avoid false alerts from my camera?
Enable person detection, define activity zones that exclude the street and branches, and lower sensitivity if needed. Then test with a real walk-through.
Can I install the camera myself when renting?
Yes, with an adhesive bracket or light fixing: the install is reversible without marks. Avoid drilling the façade without the landlord’s written consent, and keep the original parts to restore the property at the end of the tenancy.
Conclusion: should you install an outdoor camera yourself?
Yes — provided you choose the location well (height, angle, Wi-Fi range) and a model suited to your situation: battery for rentals, solar for spots without an outlet, wired for continuous recording. The install itself takes under 2 hours, the saving versus a professional reaches $90–$220, and a visible camera remains one of the best deterrents against burglary.
If you’re hesitating between models, check our best wireless outdoor security cameras 2026 comparison and our selection of Matter-compatible cameras. For complete home protection, pair the camera with our round-up of subscription-free home alarm systems and our guide to the best smart video doorbells.
About the author: Alex Mercer is a tech writer specialising in smart home and connected security. He has installed and tested more than 20 cameras, alarms and smart locks in real-world conditions. This article was last updated in August 2026.
Sources: Ministry of the Interior statistical report 2025 (2024 burglaries); CNIL practical guidance on video surveillance in private premises; Matter 1.4 specifications from the Connectivity Standards Alliance; installation guides from Arlo, Ring, TP-Link Tapo, Reolink and Eufy.