How to Install a Robot Lawn Mower in 2026: Step-by-Step Guide
Installing a robot lawn mower takes between two and four hours for a 300 to 500 m² garden, and requires no electrician skills: the docking station plugs into an outdoor outlet and the boundary wire sits on the ground or is buried two centimetres deep. We installed six models this summer for our best robot lawn mower comparison for 2026 — here is the exact method, the settings that save you from endless trial and error, and the mistakes that all end with a call to support.
Last updated: September 2026. Methodology: installation and day-to-day use of six robot mowers (Segway Navimow H800N, Dreame Roboticmower A1, Husqvarna Automower 420X NERA, Gardena Sileno City 500, Worx Landroid Vision M600, EcoFlow Blade) from June to August 2026 on four test lawns of 100 to 1,200 m² — wire layout, RTK base station, first mow, schedules, then eight weeks of fault and intervention tracking.
What to know before opening the box
A robot mower is not a vacuum cleaner you plug in and let run. You have to define its working area, either with a boundary wire or — on recent models — with RTK GPS and a camera. This step decides everything else: a badly laid wire means lost mowers, corners that never get cut and robots circling near the base.
The box contains almost everything: the charging station, the power supply, the boundary wire (150 to 250 m depending on the lawn size), pegs, waterproof connectors and a manual. What is often missing is a weatherproof outdoor outlet near the garden, a hammer or mallet, wire cutters and — if you want to bury the wire — a narrow spade or a turf cutter.
💡 Before you buy, ask yourself three questions: is there an outdoor outlet within 10 m of the future base location? Is the lawn split into islands (trees, flower beds, a pond) that will force wire out-and-backs? Does the ground exceed 25% slope anywhere? If the last answer is yes, check the maximum slope rating of the model — it ranges from 25% (Gardena) to 45% (Husqvarna, Segway, Dreame, EcoFlow).
Step 1: pick the right spot for the charging station
The base is the starting point of every cycle. Its location is chosen once and rarely regretted — as long as you follow five rules we verified in the field.
- On a flat, stable surface. The station must not move when the robot docks. On soft ground, put a paving slab under the base.
- At the edge of the lawn, never in the middle. The robot needs to enter and exit in a straight line: keep two clear metres in front of the base. A slanted approach or an obstacle 50 cm away and the docking fails — it is the number one cause of “robot stuck near the base”.
- Within 10 m of a weatherproof outdoor outlet. The power supply usually ships with 10 to 15 m of cable, but the shorter the run, the less supply cable you have to hide.
- Out of direct sun and sprinkler reach. Sun heats the base and the contacts in summer; sprinkler water attacks the blades and contacts. A spot under the eaves or a base with an integrated roof (like the Husqvarna 420X NERA) solves both.
- Away from foot traffic. A base in the middle of a path means a mower that is constantly avoided and kids who move it around.
Fix the base with the screws provided, plug in the power supply, then check that the LED turns green. If it flashes red, the problem is almost always the supply or the polarity of the boundary wire — which is exactly what we cover next.
Step 2: lay the boundary wire — the real technical step
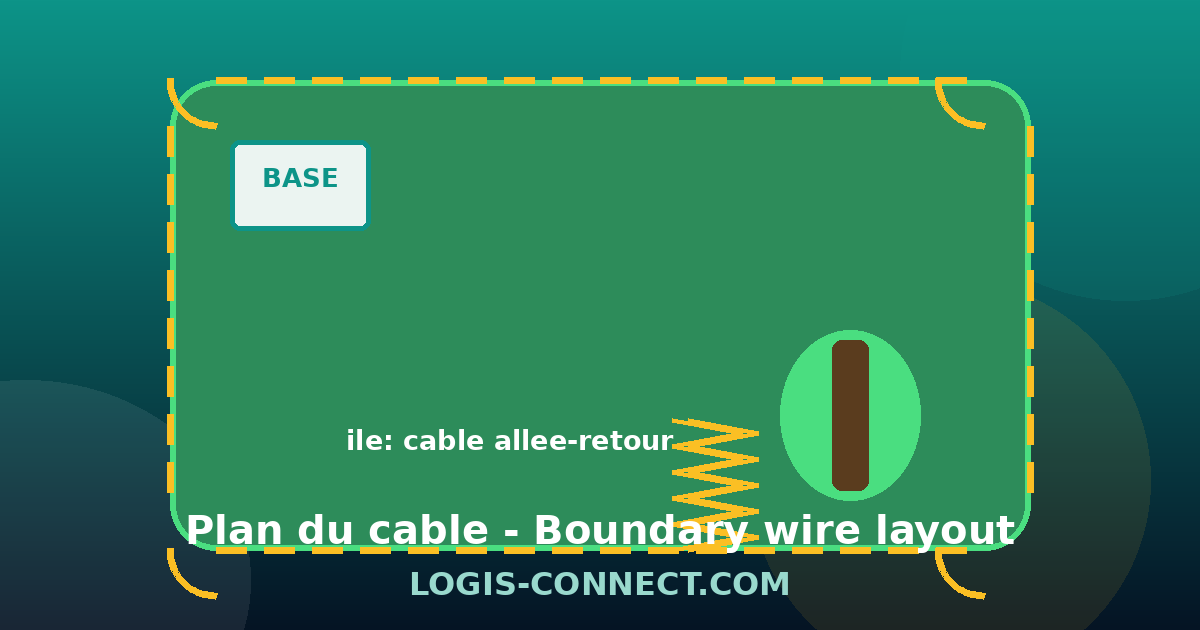
The boundary wire is a closed loop that leaves one contact of the base and returns to it. The robot detects the magnetic field it emits and never crosses it. Three rules apply to every brand:
- Respect the edge distance in the manual — usually 25 to 40 cm from the edge of the lawn. Too close and the robot rides onto the gravel or the flower bed; too far and you lose a useless strip of grass.
- Peg every 50 to 80 cm. A loose wire gets ripped out by the mower itself or by animals, and a lifted loop distorts the signal.
- No right angles. In corners, make a wide, rounded loop (the wire must turn at 90° minimum, never a tight bend). The robot follows the curve; a sharp angle makes it spin in place and dig out the corner.
Two schools of thought on the finish: leave the wire on the surface held by pegs, or bury it 1–2 cm deep with a turf cutter or a narrow spade. Surface wire takes an hour to install and is easy to move; it freezes, fades and risks being cut by the strimmer. Buried wire is invisible and protected, but adds half a day. Our choice after four lawns: bury everywhere a strimmer passes, keep it on the surface elsewhere.
Islands: trees, flower beds and ponds
This is the step everyone gets wrong on the first attempt. To exclude an obstacle in the middle of the lawn, the wire must leave the border, reach the obstacle, loop around it, then come back along the same path with both strands touching. Two touching wires cancel each other’s signal: the robot does not see them and drives over them as if they did not exist. If you leave a gap between the out and return runs, the robot enters the loop and gets trapped circling the tree. In our tests, a twisted island (strands crossed every 20 cm) works just as well as parallel strands taped together.
To cross a path or a hard border, the wire runs under the paving or in a groove cut with an angle grinder, protected by a small conduit. Never leave it on the surface across a walkway: the wheels of a regular mower and passing cars will eventually cut it.
Step 3: connect, test, run the first mow
Once the loop is closed back on the base, connect both ends to the terminals following the colour marks, then test. The base LED confirms the loop; on Husqvarna and Gardena models, a diagnostic menu shows signal quality. If nothing works, the fault is almost always a cut: the wire tester supplied (or a multimeter in continuity mode) locates the break in minutes.
Before the first mow, set the cutting height to the highest setting (5 to 6 cm). Golden rule of lawns: never cut more than one third of the height at once. If the grass is over 10 cm, run a regular mower once first — a robot mowing grass that is too tall gets clogged, leaves clumps and throws sensor errors. Then launch a first cycle in manual mode and stay close to the robot: this is the moment to check that it follows the wire in the corners, crosses the islands and finds its way back to the base.
Wire or wire-free (RTK): installation changes completely
Since 2025, a growing number of robot mowers skip the wire thanks to RTK GPS, sometimes assisted by a camera (Segway Navimow, Dreame A1, EcoFlow Blade, Worx Vision). Installation has nothing in common: you place an RTK reference station (a small beacon on the roof, the fence or a pole), then define the area by pushing the robot around the perimeter or from the app. Count 30 minutes instead of three hours.
| Criterion | Boundary wire | Wire-free (RTK / camera) |
|---|---|---|
| Installation time | 2 to 4 hours (buried: half a day) | 30 minutes to 1 hour |
| Edge precision | Excellent, repeatable | Good to very good (RTK: 2 to 3 cm) |
| Clear sky required | No | Yes — watch out for tall trees and nearby walls |
| Changing the layout | Move the wire by hand | Redraw the perimeter in the app in 5 minutes |
| Average price 2026 | €500 to €1,500 | €900 to €2,500 |
| Recommended lawn size | Any, ideal under 600 m² | From 300–500 m² |
| Main risk | Cut wire (strimmer, rodents) | GPS signal loss near tall obstacles |
On RTK models, the reference beacon location matters more than anything else: it must see the sky in every direction, away from walls and tall trees. A reduced field of view shows up as drifts of a few centimetres that, at the edges, become uncut strips of grass. The Dreame A1 and the Worx Vision compensate with a front camera that corrects the path — useful in tree-filled gardens, but they need more light and more upkeep (lens cleaning).
✅ Installing it yourself
- Save €300 to €700 of labour, i.e. 20 to 40% of the price of a wired model.
- You learn your terrain: you will be able to repair a wire or move the base without waiting for a technician.
- Doable in a weekend for 90% of gardens under 800 m².
- Brand video tutorials cover every step, including islands.
⚠️ Hiring a professional
- Installation billed at €300 to €700 depending on area, burying and terrain complexity.
- Justified for large lawns (over 1,000 m²), steep slopes or a garden split into dozens of islands.
- Some brands include installation in the offer (Husqvarna, Gardena through their approved installers) — sometimes negotiable at purchase.
- Useful when an “installation included” warranty covers recurring issues.
Step 4: set up the app and the schedules
Pairing happens over Wi-Fi (2.4 GHz only — a 5 GHz guest network will not be detected), followed by a firmware update that can take twenty minutes. Take the time to enable the PIN code and geofencing: robot mowers are easy to steal, and recent models lock themselves and alert you if they leave the perimeter. If the garden sits at the edge of your Wi-Fi coverage, a repeater aimed at the lawn fixes the disconnections before they appear.
For the schedule, daily mowing during the growth season gives the best result: the robot cuts 1 to 2 mm every day, the grass stays short and the blades do not yellow. In summer, two to three passes a week are enough. Schedule late morning when the dew has evaporated — wet grass sticks under the chassis and cut quality drops. Most apps also handle a rain sensor or weather forecasts to postpone the cycle automatically. If you have paired the garden with a smart irrigation system, avoid mowing and watering on the same morning: the robot slips on wet grass and mud clings to the blades.
The installation mistakes we see everywhere
After eight weeks troubleshooting our own installations and those of three volunteer neighbours, here are the seven recurring faults — and how to avoid them from day one.
- The wire too close to the edge. Within 20 cm, the robot rides the border, gets stuck on it or mows the gravel. Respect the manual distance (25 to 40 cm).
- Tight corners. The robot cuts across the corner and leaves an uncut circle. Loop wide: 30 cm radius minimum.
- An island without a paired out-and-back. The robot enters the loop and circles the tree until the battery dies. Twist the two strands together.
- The base exposed to sun or sprinklers. Oxidised contacts, a robot that refuses to charge. Shelter the base or choose a model with a roof.
- Surface wire across a walkway. Guaranteed first cut. Bury it or run it through a conduit.
- First mow on tall grass. Saturated sensors, clumps, error codes. Mow once with a regular mower above 10 cm.
- Ignoring the real slope. A slope rated 25% usually applies to a smooth bank — a 5 cm step or a border to climb stalls perfectly compliant robots. Check the obstacle-climbing rating (2 to 3 cm depending on the model).
⚠️ The symptom that misleads: a robot that “circles” or refuses to leave the base is not a faulty robot. In 8 cases out of 10 for us, it was a cut wire (strimmer or rodents), a badly closed loop or a base sitting too close to the wire. The base diagnostic menu and a multimeter solve it in fifteen minutes.
Maintenance after installation
Once installed, the robot mower asks for little, but regularly: clean the chassis and blades every two to three weeks (dried grass under the chassis eventually unbalances the cut), replace the blades once or twice a season (€15 to €30 per set) and keep the base contacts clean. At the end of the season, unplug the supply, store the robot in a dry, frost-free room with the battery charged between 50 and 60%, and clean the base. In spring, one walk around the lawn to spot wires lifted out of the ground prevents the first breakdown of the year.
FAQ: installing a robot lawn mower
Do I have to bury the boundary wire of a robot mower?
No, it is not mandatory: held by pegs every 50 to 80 cm, it works perfectly on the surface. Buried 1–2 cm deep, it survives the strimmer, frost and rodents. Our advice: bury it everywhere a strimmer passes, leave it on the surface elsewhere — and never run it across a path without a conduit.
How far should the wire be from the edge of the lawn?
25 to 40 cm depending on the model — the manual gives the exact value. This distance lets the robot mow without riding the border. Too close, it cuts into the gravel or the flower bed; too far, you sacrifice a strip of grass several centimetres wide all around the perimeter.
Can I install a robot lawn mower myself?
Yes, for the vast majority of gardens: count two to four hours for a 300 to 500 m² lawn with wire, thirty minutes to an hour for a wire-free RTK model. Professionals pay off beyond 1,000 m², on steep slopes or heavily split terrain — expect €300 to €700 for the install.
Why does my robot mower not find its charging station?
In order, check: the clearance in front of the base (two clear metres in a straight line), the cleanliness of the charging contacts, and the state of the wire between the base and the lawn. A wire that moved or was cut near the base disturbs the docking guidance — the station’s diagnostic menu confirms it in seconds.
Is a wire-free (RTK) robot mower really cable-free?
Yes: the area is defined by pushing the robot around the perimeter once, or directly in the app. RTK precision reaches 2 to 3 cm, but it needs a clear sky: under tall trees or against a wall, the camera of hybrid models (Dreame A1, Worx Vision) takes over, with extra light requirements and lens cleaning on top.
What is the maximum slope a robot mower can handle?
From 25% (Gardena Sileno) to 45% (Husqvarna NERA, Segway Navimow, Dreame A1, EcoFlow Blade) depending on the model. Note that the rating applies to a smooth bank, not steps or bumps — obstacle climbing (2 to 3 cm) is another spec to check if the ground is uneven.
Should I mow before the robot’s first use?
Only if the grass is over 8 to 10 cm. A robot mowing grass that is too tall gets clogged, leaves clumps and throws errors. Otherwise, set the cutting height to 5 to 6 cm for the first cycles, then lower it gradually to the height you want.
How much does professional robot mower installation cost?
Between €300 and €700 depending on the area, wire length, burying and terrain complexity. On a €900 wired model, that is 30 to 40% of the price — which is why DIY pays off. Some brands (Husqvarna, Gardena) have approved installers and sometimes bundle the installation into a package deal.
Can the robot mower mow in the rain?
Most models are designed for it, but wet grass sticks under the chassis, cut quality drops and the robot slips on slopes. Schedule the cycles late morning and enable the rain sensor or the weather detection in the app to postpone the mow automatically.
What should I do with the boundary wire in winter?
Nothing, if it is buried or properly pegged: it stays in place and handles frost. In spring, check that no loop is sticking out before the first mow — that is when wires lifted by frost or garden tools get cut. The base, for its part, gets unplugged and stored dry with the robot.
The bottom line
Installing a robot lawn mower is one afternoon of work for years of free Sunday mornings. The method comes down to three decisions: a clear, sheltered spot for the base, a wire laid without sharp corners or badly twisted islands (or an RTK beacon that sees the sky), and a cautious first mow on grass that is not too tall. The rest — schedules, zones, fine tuning — gets polished in the app over the weeks.
If you are still hesitating between the technologies, our comparison of the six best connected robot mowers for 2026 breaks down the strengths of each approach by lawn size and budget. And once the grass is under control, the rest of the garden deserves the same treatment: connected outdoor lighting extends the evening season, and automatic irrigation finishes the job when you are away.
About the author: Alex Mercer is a technical writer specialising in smart home and connected gardening. He installs and runs every robot mower himself for several weeks before recommending it. See the author’s profile.
Last updated: September 2026. Sources: installation manuals of Husqvarna Automower, Gardena Sileno, Segway Navimow, Dreame Roboticmower and Worx Landroid (2025-2026 editions); NF EN 50636-2-107 standard on the safety of robotic lawnmowers; consumption and reliability records from our eight weeks of testing (June-August 2026). Prices recorded in September 2026.
* This article contains affiliate links. If you buy through these links, we may earn a commission at no extra cost to you. Our tests, measurements and rankings remain independent of any commercial partnership.